It's Tuesday release day! Branded links, one-click WooCommerce and more
Happy Tuesday! This week was all about making things feel like yours, and about fewer things to copy and paste. The beagle fully supports both.
Your links, on your own domain
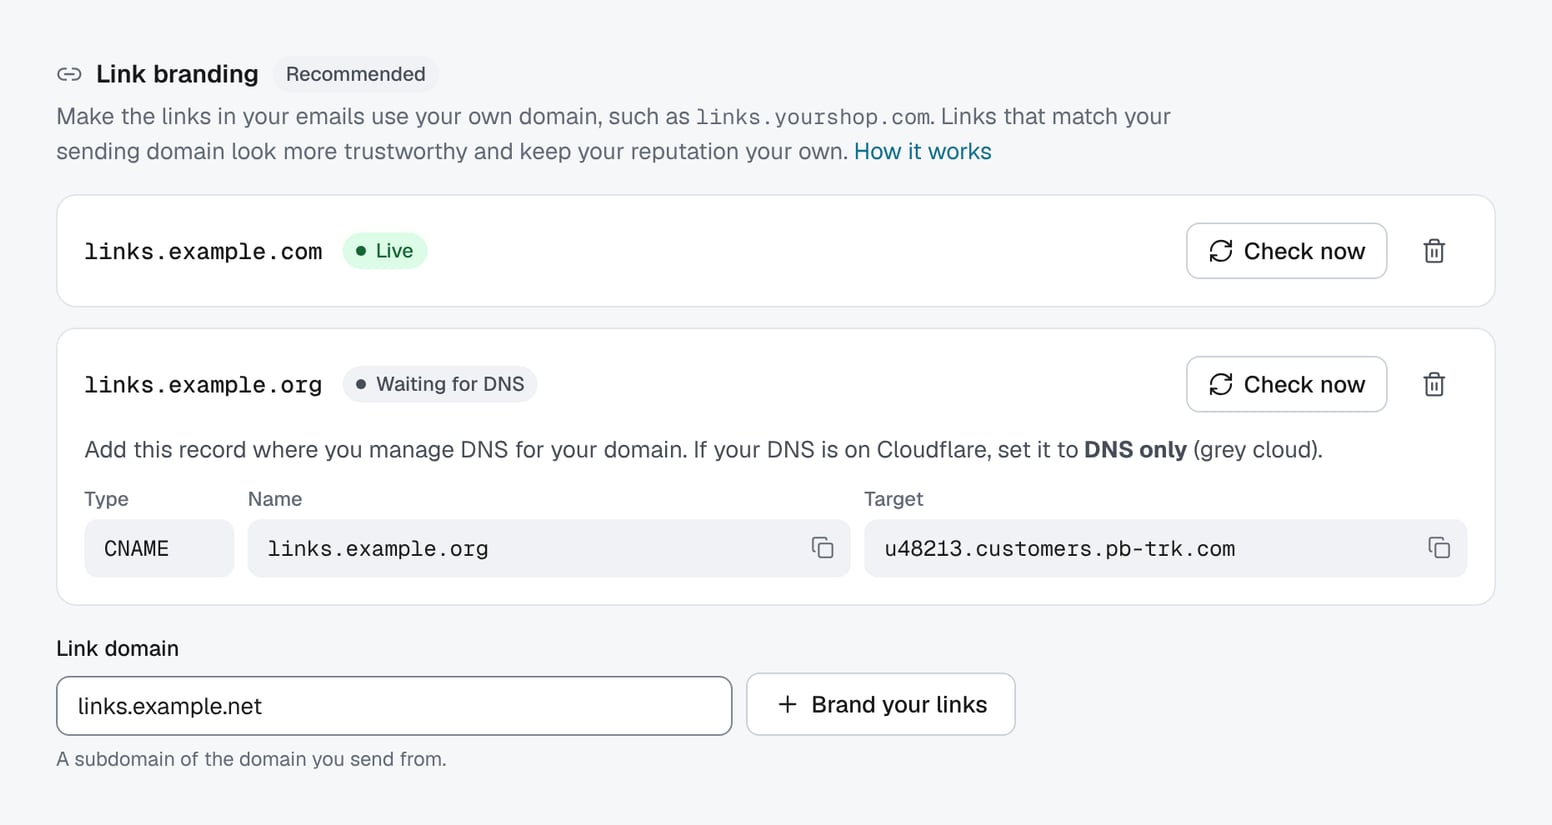
Every link in a PostBeagle email goes through a tracking address first, so we can count clicks. Until now that address was on our domain. With link branding, it can live on yours, like links.yourshop.com.
Why bother? An email from [email protected] whose links also point to yourshop.com looks consistent to readers and to spam filters, and your link reputation stays your own. Head to Settings → Domains, find Link branding, click Brand your links, add the one CNAME record we show you and click Check now. When the badge says Live, your next emails use it. New accounts on a paid plan can set it up right in the onboarding DNS step, too.
Link branding is included in paid plans, with up to three link domains per account. The campaign review step now tells you which domain your links will use, so there are no surprises. Here's how it works.
Connect your WooCommerce store in one click
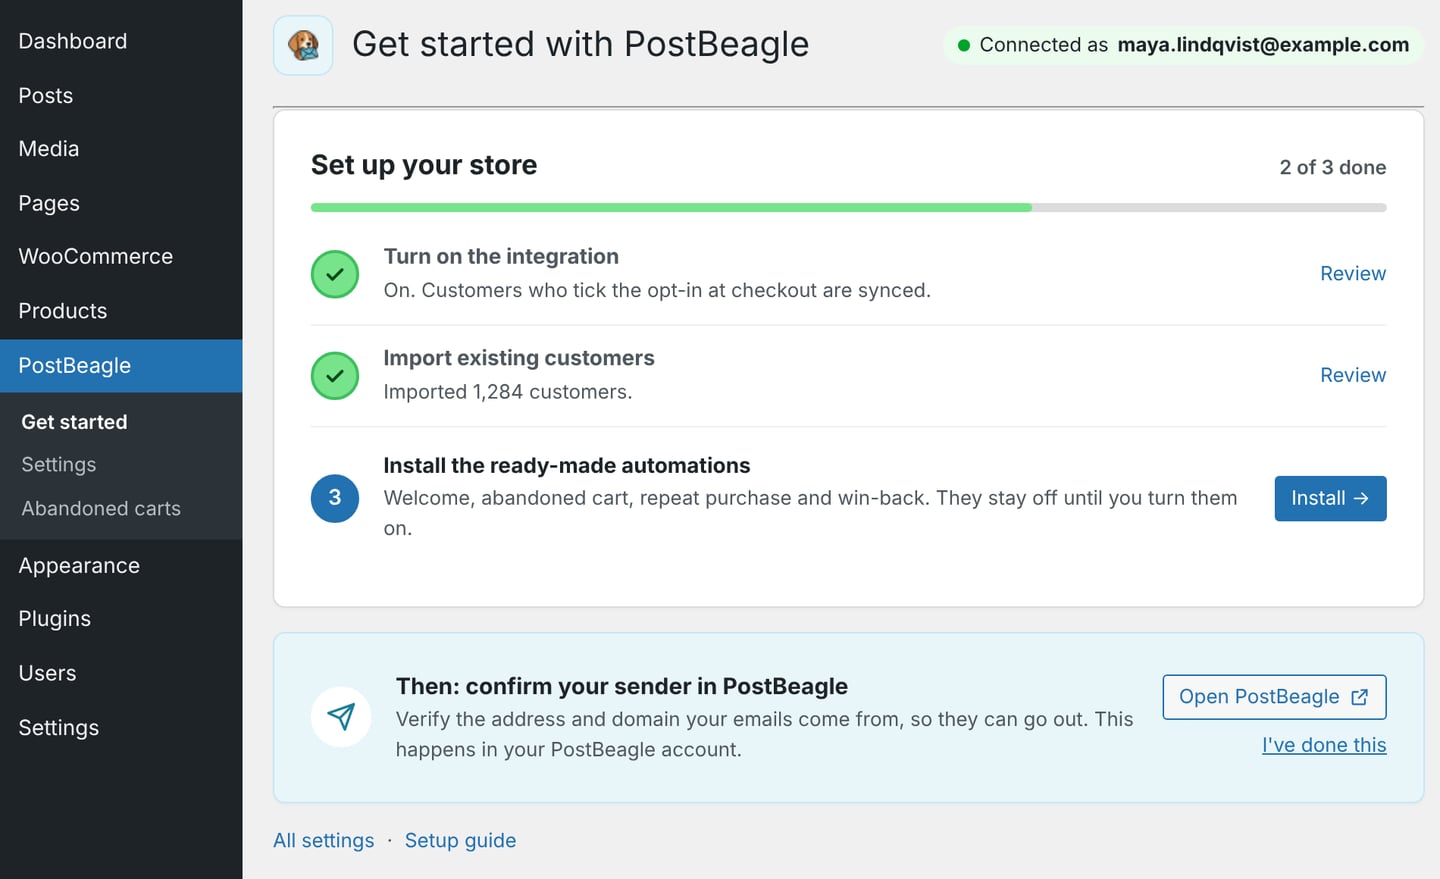
Version 1.11 of the WooCommerce plugin skips the "go find your API key" step. Click Connect to PostBeagle, sign up for a free account or log in, and you land straight back in WordPress, connected. No key to copy anywhere.
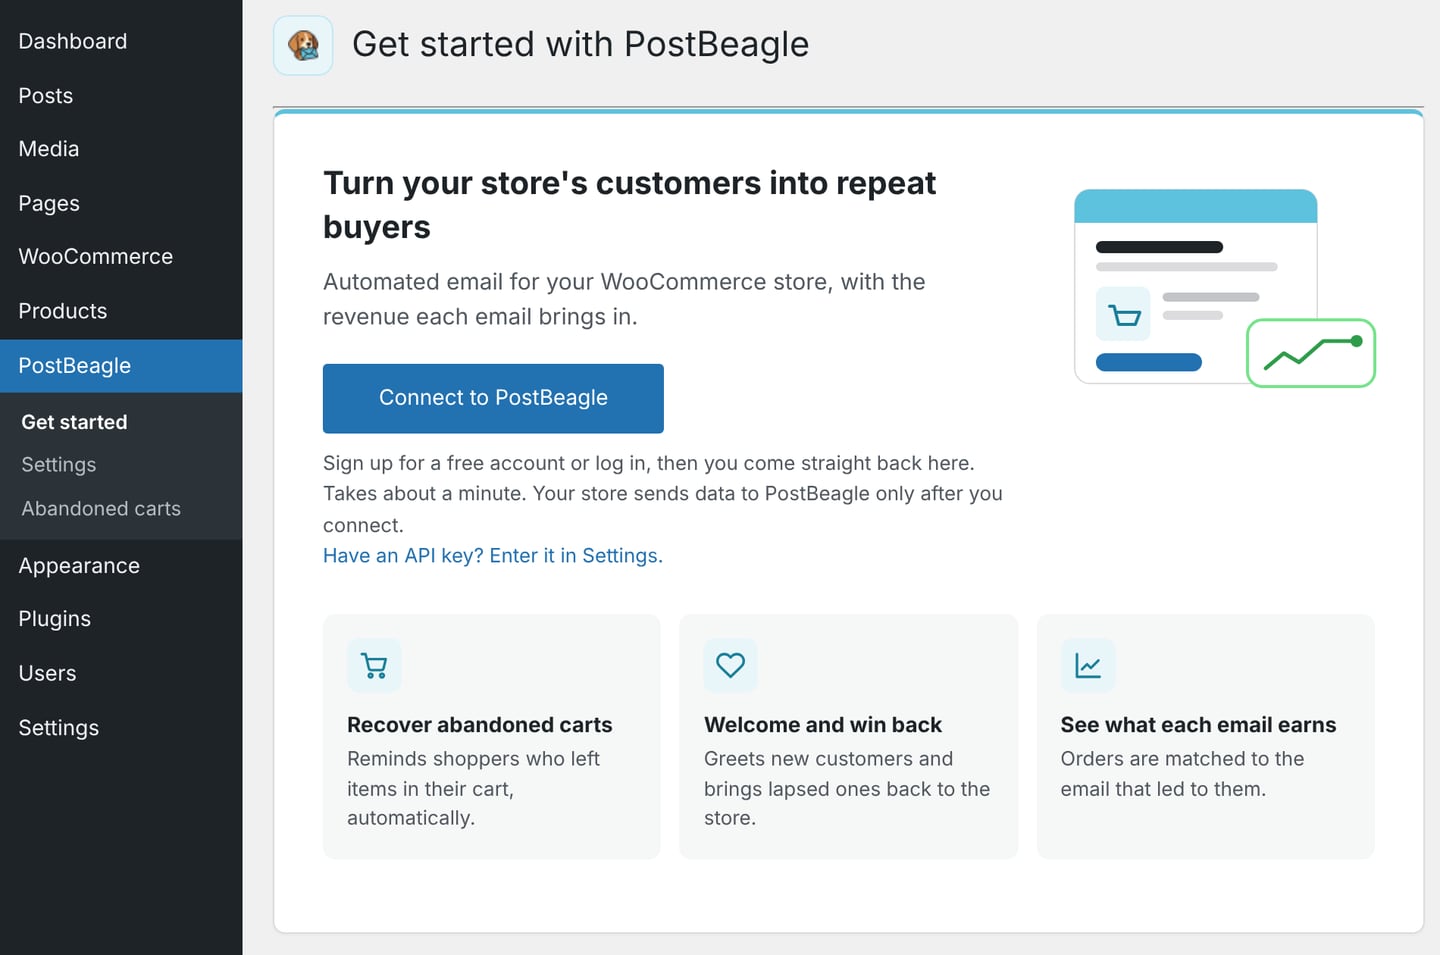
After that, a new Get started screen walks you through the rest: turn on the integration, import customers who already opted in, and install the ready-made welcome, abandoned cart, repeat purchase and win-back automations (they stay off until you switch them on). A progress bar keeps score, and plugin 1.11.1 gave the whole screen a fresh coat of paint. Your API key still works if you prefer it.
Your AI assistant can just sign in
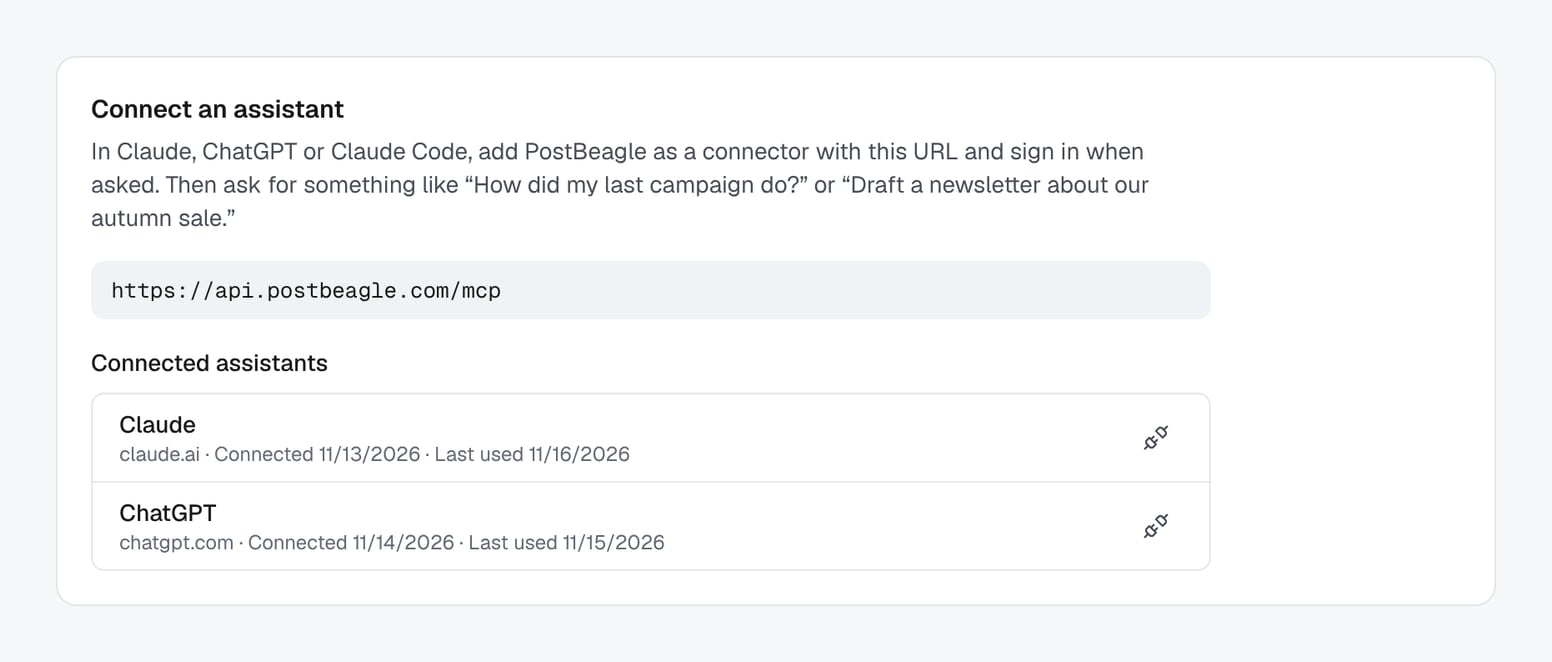
Connecting Claude or ChatGPT to PostBeagle used to mean creating a key and pasting a snippet. Now you add PostBeagle as a connector with our URL, sign in when asked, click Allow, and you're done. It works in Claude, ChatGPT and Claude Code.
Every assistant you connect this way shows up under AI Assistant → Connected assistants, and you can disconnect one anytime. Keys still work for tools like Cursor. Here's how to connect an assistant.
And a few small things
- Continue with Google is now on the sign-in and sign-up pages. Already have an account with the same email? It links up automatically.
- A round of fixes made abandoned cart tracking and bounce handling more reliable.
That's the week! Go brand some links, and we'll see you next Tuesday.